
Mac에서 PWA를 이용하여 Typescript만으로 Push 보내기
코딩하다 보면은 푸시 알림이 필요할 때가 있다. 가령, 메세지가 왔을때 내용을 전달하거나, 새로운 이벤트를 홍보해야할 때 푸시가 필요할 수도 있다. 이번 글에서는 PWA를 이용하여 웹사이트로 푸시를 보내보자.
Step 1 : VAPID key 발급받기
VAPID키는 서버와 클라이언트가 서로가 서로임을 알게 해주는 키 같은 것이다. 다음 과정을 통해 발급받자.

npm에는 web-push라는 라이브러리가 있다. 이번 프로젝트에서 매우 유용하게 쓰일 예정이다.
우선 web-push를 서버쪽 프로젝트에 설치해준다.
npm install web-push --save이후 다음과 같은 코드를 실행하여 VAPID JSON 파일을 얻는다.
npx web-push generate-vapid-keys --json
{
"publicKey":"BGtkbcjrO12YMoDuq2sCQeHlu47uPx3SHTgFKZFYiBW8Qr0D9vgyZSZPdw6_4ZFEI9Snk1VEAj2qTYI1I1YxBXE",
"privateKey":"I0_d0vnesxbBSUmlDdOKibGo6vEXRO-Vu88QlSlm5j0"
}
결과 JSON
이것을 서버쪽 vapid.ts 에 vapid라는 변수로 저장해주자. 나중에 이 프로젝트를 Github와 같은 곳에 올릴때 이 파일은 빼고 올려야 한다. Private Key는 중요하다......
Step 2 : Client 코드 구성
우선 클라이언트 쪽부터 만들어보자. PWA가 작동하기 위해서는 service-worker(js)와 manifest(JSON)이 필요하다.
service-worker는 빈 파일로 놔두고, 우선 manifest를 간단하게 만들어보겠다.
{
    "short_name": "App",
    "name": "My AwesomeApp",
    "description": "An example of a Progressive Web App manifest file.",
    "start_url": "/index.html?homescreen=1",
    "display": "standalone",
    "background_color": "#ffffff",
    "theme_color": "#ffffff",
    "orientation": "portrait-primary",
    "scope": "/",
    "lang": "en-US",
    "dir": "ltr",
    "related_applications": [],
    "prefer_related_applications": false,
    "serviceworker": {
      "src": "/service-worker.js",
      "scope": "/",
      "type": "classic"
    }
  }
icon도 필요한데, 이건 별로 중요하지 않아서 본인들이 원하는 사진으로 채워넣어도 상관없다. 너무 크지만 않으면 된다.
푸시 권한을 얻으려면 기본적으로 사용자의 상호작용이 있어야 한다. 따라서 src/index.html에는 다음과 같이 버튼을 하나 추가해주자 :
<html>
    <head>
        <link rel="manifest" href="/public/manifest.json">
    </head>
    <body>
        index.html
        <button id="requestPermissionButton">Request Notification Permissions</button>
        <script type="module" src="index.ts"></script>
    </body>
</html>
이제 대망의 index.ts를 코딩해보자. index.ts에서 하는 역할은 다음 3가지이다.
i) service-worker 등록
ii) Notification Permission Handler 등록
iii) Notification Permission Request
i) service-worker 등록하기
navigator 내부에는 serviceWorker라는 것이 있다. 이것이 없으면(A) 애초에 PWA를 못만드는 것이고, 있는데 등록이 안될수도 있다(B). 이 두가지 케이스를 에러처리해주면 첫 단계는 끝난다.
function registerServiceWorker() {
    const url = new URL('./serviceWorker.js', import.meta.url).toString();

    return new Promise((resolve, reject) => {
              if ('serviceWorker' in navigator) {
                navigator.serviceWorker
                  .register(url, {
                    scope: '/',
                    type: 'module',
                  })
                  .then(function (registration) {
                    console.log(
                      'Service Worker registered with scope: ',
                      registration.scope,
                    );
                    resolve({ isSuccess: true, registration });
                  })
                  .catch(function (error) {
                    //B case
                    resolve({
                      isSuccess: false,
                      errorMessage: `Service Worker registration failed: ${error.message}`,
                    });
                  });
              } else {
                //A case
                resolve({
                  isSuccess: false,
                  errorMessage: 'serviceWorker is not in navigator',
                });
              }
            });

}
ii) & iii) Notification permission 요청하기
아까 index.html에 있던 requestPermissionButton에 Event Handler를 달아준다. 그런 뒤 serviceWorker.ready 내부의 pushManager에서 subscription 정보를 얻어온다.이후 아래와 같은 방법으로 pushManager에 "구독"을 한다. 이떄 applicationServerKey자리에는 아까전에 발급받은 VAPID 키 중 public 키를 집어넣는다.
async function requestNotificationPermissions() {
    console.log('boo')
    try {
        const registration = await navigator.serviceWorker.ready;
        const subscription = await registration.pushManager.getSubscription();
        if (!subscription) {
            const newSubscription = await registration.pushManager.subscribe({
                userVisibleOnly: true,
                applicationServerKey: 'YOUR_PUBLIC_VAPID_KEY_HERE'
            });
            console.log('subscription => ', newSubscription.toJSON());
            console.log(newSubscription.endpoint);
        }
    } catch (e) {
        console.error(e);
    }
}

function addNotificationPermissionRequestEventHandler() {
    document.getElementById('requestPermissionButton')?.addEventListener('click', requestNotificationPermissions);
}
Step 3 : Server 코드 구성
i) 서버쪽 준비
우선 필요한 것을 import 해주자.
import webPush, { PushSubscription, SendResult } from 'web-push';
import vapid from './utils/constants/vapid'; //처음에 vapid.ts를 저장한 위치
또한, 푸시를 하기 위하여 필요한 type들을 interface를 이용해 정의해준다.
interface SubscriptionKeys {
  p256dh: string;
  auth: string;
}

interface Subscription {
  endpoint: string;
  keys: SubscriptionKeys;
}
아까 Server에 깔았던 web-push 를 기억하는가? 이놈은 현재는 우리가 무슨 서버인지 모른다. 따라서 서버의 주소와 같은 VAPID key를 대입해줘야 한다.
webPush.setVapidDetails(
  'mailto:fancy-dummy-email@gmail.com', // Contact email or URL
  vapid.public,
  vapid.private,
);
다음 단계에서 얻게 될 구독 정보(endpoint)를 넣을 칸만 먼저 만들어두자.
const subscription: Subscription = {
  endpoint:
    'https://web.push.apple.com/blahblahblah',
  keys: {
    p256dh:
      'blahblahblahblah',
    auth: 'blahblahblahblah',
  },
};
Payload는 간단하게 구성해주었다. 이후,
const payload = JSON.stringify({
  title: 'Test Notification',
  body: 'This is a test push notification sent from TypeScript!',
});

const sendPushNotification = async (): Promise<void> => {
  try {
    const response: SendResult = await webPush.sendNotification(
      subscription,
      payload,
    );
    console.log('Push sent successfully:', response);
  } catch (error) {
    console.error('Error sending push notification:', error);
  }
};

sendPushNotification();
서버쪽 코딩은 끝났다. 클라이언트를 마무리하자.
ii) 클라이언트쪽 준비
우리가 지금까지는 service-worker.js는 비워두었다. 하지만 서버에서 알림을 받았을 때 그것을 표시하려면 여기에도 약간의 코드가 필요하다.
self.addEventListener('push', (event) => {
    const text = event.data.text();
    event.waitUntil(
        self.registration.showNotification('PUSH!', {
            title: event.data.json().title,
            body: event.data.json().body,
            data: {
                url: 'https://www.google.com',
            },
        })
    );
})
이제 기본적인 준비는 끝났다. 본격적으로 푸시를 보내보자. 이 프로젝트는 가장 기본적인 push만 테스트해보고자 server와 client사이에 자동으로 subscription info를 얻는 코드는 작성하지 않았다. 그래서 client에서 subscription이 떨어지면, 그것을 server로 복사해주어야 한다...
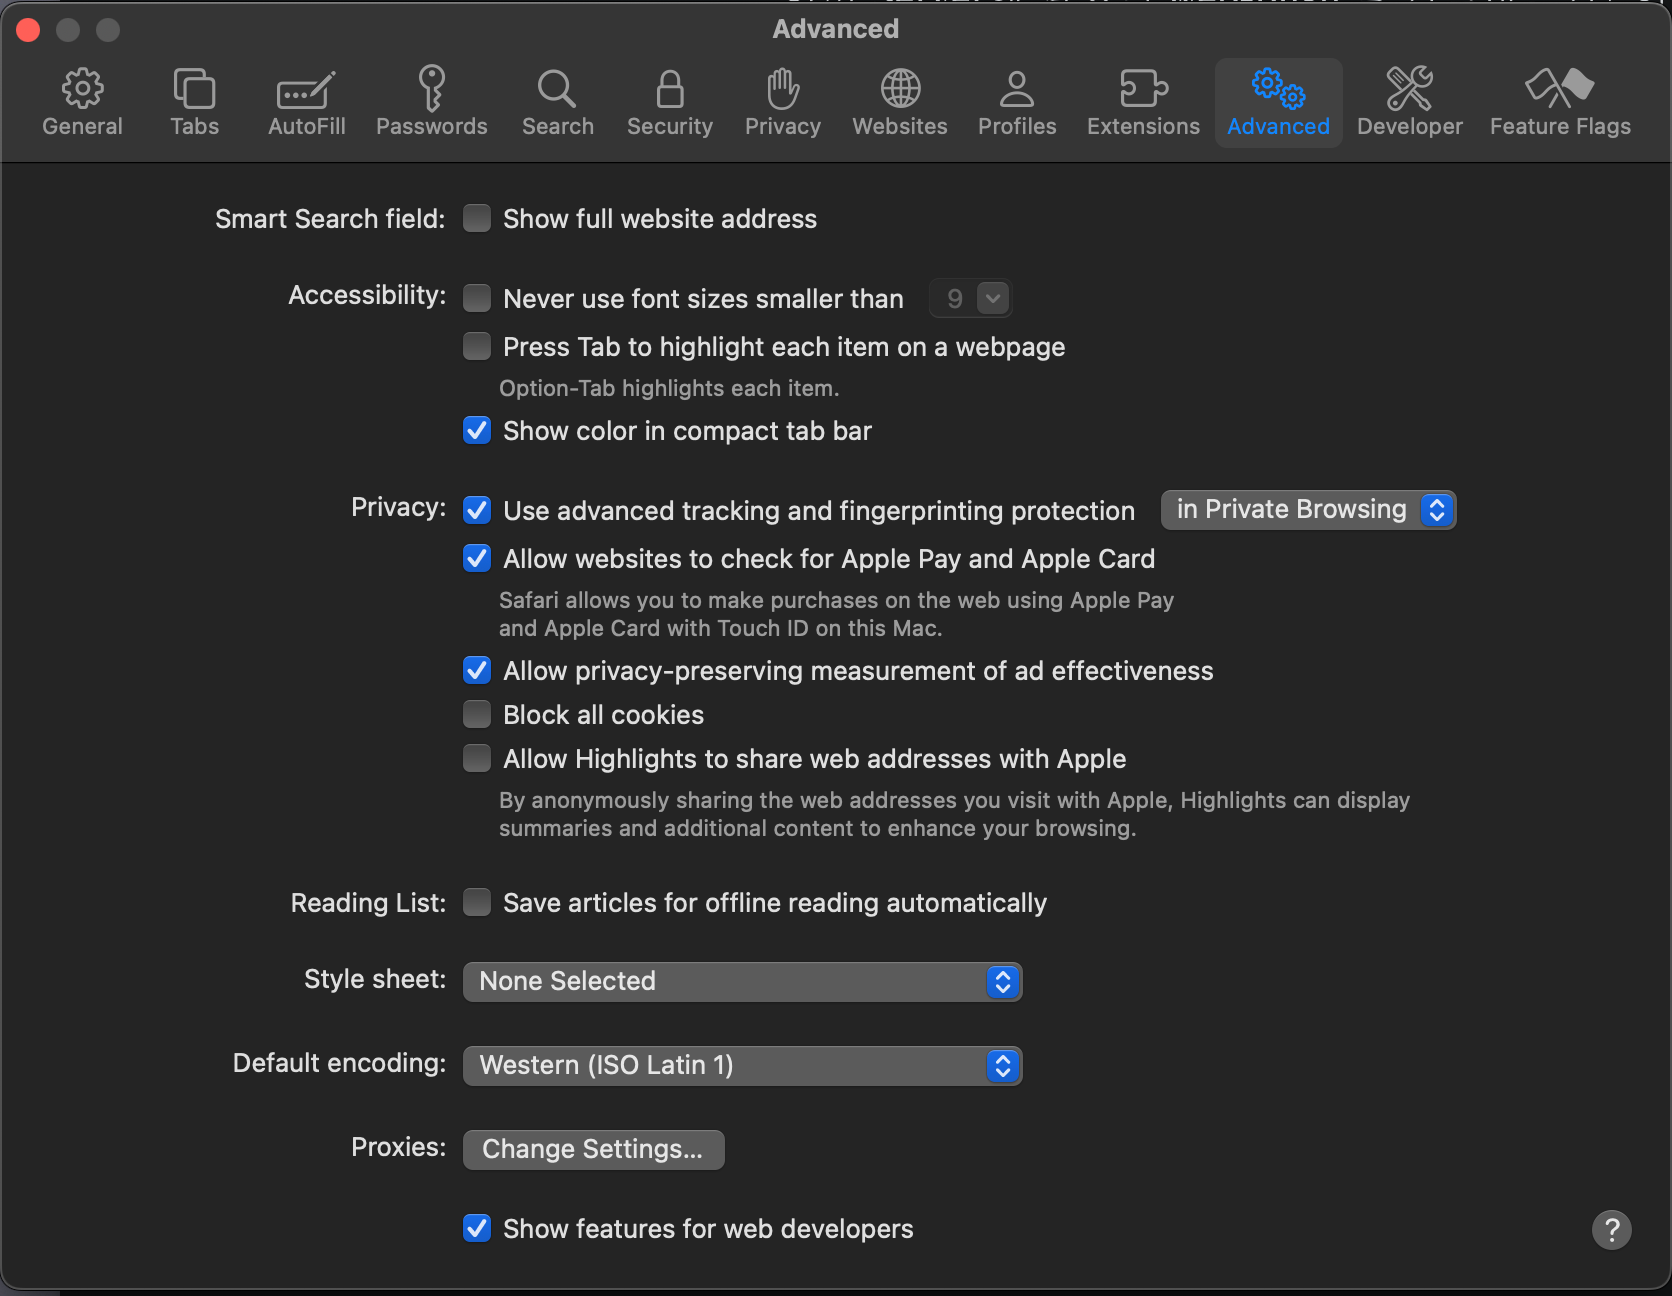
우선 PWA를 Ngrok을 이용하여 실행한 후 핸드폰에 설치한다. PWA를 설치한 핸드폰과 컴퓨터를 케이블로 연결해준다. 이후 사파리 설정에서 Advanced –> Show features for web developers를 켜준다.
그다음, 새로 생긴 Developer 탭에 가서 Allow Remote Automation을 켜준다.
마지막으로, 핸드폰에서 PWA를 실행한 후 위에 메뉴 바의 Develop - 핸드폰 이름 - PWA 웹사이트의 이름 버튼을 누르면 web inspector와 같은 창이 생긴다. 핸드폰에서 뜨는 Request Notifications 버튼을 누르면 권한 요청 알림이 뜨고, 이때 허용을 누른다면 콘솔에 구독 정보가 오는 것을 확인할 수 있다. 이 정보를 복사해두자. 다음 단계에서 필요하다.
iii) Push Testing
방금 복사한 정보를 서버의 index.ts에 복사해 넣어준 다음, 서버를 실행시켜준다. 핸드폰을 켜고 기다리면 알림이 오는 것을 확인할 수 있다.
오늘은 PWA를 사용하여 간단한 푸시 기능을 만들어보았다.
사용된 라이브러리/기술
-web-push(npm)
-ngrok(brew)
-safari developer menu(safari)